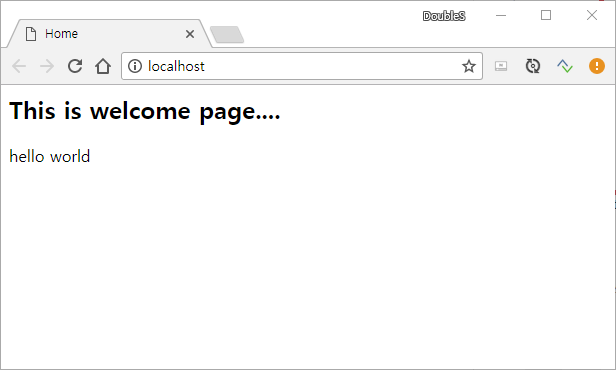
IntelliJ에서는 STS(Spring Tool Suite)처럼 Spring MVC Project를 생성하는 방법이 따로 존재하는 것 같지 않다. 구글링을 통해 참고한 내용들을 바탕으로 직접 IntelliJ에서 Spring Mvc Project를 생성하는 과정을 정리해보았다. STS에서 처럼 기본적인 Spring MVC Project를 생성하고, 웹페이지에 hello world를 출력하기까지는 아래와 같이 크게 5가지의 단계를 거친다.
- Maven module을 생성한다.
- Maven module을에 Spring Framework중에서 Spring MVC를 추가한다.
- 스프링 관련 설정, 디렉토리 생성 및 설정을 한다.
- Tomcat 서버 설정을 한다.
- 기본/테스트 package와 views 디렉토리를 생성한다.
이렇게 설정을 하고나면 아래와 같은 구조가 된다. 이제 마지막으로 HomeController, home.jsp를 작성하고 나서
tomcat server를 구동하게 되면 루트 웹페이지에서 hello world라는 문구를 출력하게 된다.
src
 ├── main
 |    ├── java : java code
 |    ├── resourecs : mapper, log 관련 설정 xml (log4j.xml)
 |    └── webapp : web 디렉토리
 |           ├── resources : js, css 등의 정적 자원들
 |           └── WEB-INF : web information 디렉토리
 |                 ├── spring-config : spring관련 설정 xml (dispatcher-servlet.xml, applicationContext.xml)
 |                 └── views : jsp
 └── test : test 관련 디렉토리
      ├── java : java test code
      └── resources : test 관련 resources
pom.xml
STS에서 간단하고 편하게 프로젝트를 생성하고 쓰면되지 않을까? 라는 생각이 들 수 있다. 하지만 나의 경우 여러가지 편의기능을 제공하는 IntelliJ에 익숙해져 있기 때문이기도 하고, 세세한 설정을 직접 해보면서 공부를 해봐야겠는 생각에 이렇게 번거로운 작업을 하게 되었다.
그렇다면 이제 각각의 단계를 좀더 자세하게 정리해보자.
1. Maven module 생성하기
File>New>Module>create from archetype:maven-archetype-webapp선택한다.- 모듈의
groupId,artifact를 작성한다. - module이 생성되고 나면 maven빌드가 진행되고 최종적으로 콘솔창에
maven BUILD SUCCESS라는 메시지가 뜨면 성공적으로 생성된 것이다.
2. Spring MVC 추가
- 생성된 module 우클릭 후
add framework support...선택한다. spring mvc선택한다. 이때 기존의 라이브러리를 사용하는 것보다는 다운로드를 선택해서 진행하는 것이 좋다. 그렇지 않으면dispatcher-servlet.xml,applicationContext.xml이 추가되지 않아 직접 생성하고 작성해줘야되서 번거롭다.dispatcher-servlet.xml,applicationContext.xml을WEB-INF디렉토리 하위에spring-config디렉토리를 생성하여 이동시켜준다.
3. Spring 관련 설정 수정 및 추가, 디렉토리 생성 및 Role 설정
3.1 pom.xml : 프로젝트의 정보 및 dependency를 기술
properties : java, spring, aspectj, slf4j 버전을 명시해준다.
<properties>
    <java-version>1.8</java-version>
    <org.springframework-version>4.3.12.RELEASE</org.springframework-version>
    <org.aspectj-version>1.6.10</org.aspectj-version>
    <org.slf4j-version>1.6.6</org.slf4j-version>
</properties>
dependencies : maven 라이브러리 추가를 추가해준다.
<dependencies>
    <!--Spring-->
    <dependency>
        <groupId>org.springframework</groupId>
        <artifactId>spring-context</artifactId>
        <version>${org.springframework-version}</version>
        <exclusions>
            <!-- Exclude Commons Logging in favor of SLF4j -->
            <exclusion>
                <groupId>commons-logging</groupId>
                <artifactId>commons-logging</artifactId>
            </exclusion>
        </exclusions>
    </dependency>
    <dependency>
        <groupId>org.springframework</groupId>
        <artifactId>spring-webmvc</artifactId>
        <version>${org.springframework-version}</version>
    </dependency>

    <!-- AspectJ -->
    <dependency>
        <groupId>org.aspectj</groupId>
        <artifactId>aspectjrt</artifactId>
        <version>${org.aspectj-version}</version>
    </dependency>

    <!-- Logging -->
    <dependency>
        <groupId>org.slf4j</groupId>
        <artifactId>slf4j-api</artifactId>
        <version>${org.slf4j-version}</version>
    </dependency>
    <dependency>
        <groupId>org.slf4j</groupId>
        <artifactId>jcl-over-slf4j</artifactId>
        <version>${org.slf4j-version}</version>
        <scope>runtime</scope>
    </dependency>
    <dependency>
        <groupId>org.slf4j</groupId>
        <artifactId>slf4j-log4j12</artifactId>
        <version>${org.slf4j-version}</version>
        <scope>runtime</scope>
    </dependency>
    <dependency>
        <groupId>log4j</groupId>
        <artifactId>log4j</artifactId>
        <version>1.2.15</version>
        <exclusions>
            <exclusion>
                <groupId>javax.mail</groupId>
                <artifactId>mail</artifactId>
            </exclusion>
            <exclusion>
                <groupId>javax.jms</groupId>
                <artifactId>jms</artifactId>
            </exclusion>
            <exclusion>
                <groupId>com.sun.jdmk</groupId>
                <artifactId>jmxtools</artifactId>
            </exclusion>
            <exclusion>
                <groupId>com.sun.jmx</groupId>
                <artifactId>jmxri</artifactId>
            </exclusion>
        </exclusions>
        <scope>runtime</scope>
    </dependency>

    <!-- @Inject -->
    <dependency>
        <groupId>javax.inject</groupId>
        <artifactId>javax.inject</artifactId>
        <version>1</version>
    </dependency>

    <!-- Servlet -->
    <dependency>
        <groupId>javax.servlet</groupId>
        <artifactId>servlet-api</artifactId>
        <version>2.5</version>
        <scope>provided</scope>
    </dependency>
    <dependency>
        <groupId>javax.servlet.jsp</groupId>
        <artifactId>jsp-api</artifactId>
        <version>2.1</version>
        <scope>provided</scope>
    </dependency>
    <dependency>
        <groupId>javax.servlet</groupId>
        <artifactId>jstl</artifactId>
        <version>1.2</version>
    </dependency>

    <dependency>
        <groupId>junit</groupId>
        <artifactId>junit</artifactId>
        <version>3.8.1</version>
        <scope>test</scope>
    </dependency>

</dependencies>
plugins : <bulid></bulid>태그 안에 플러그인을 추가한다.
<plugins>
    <plugin>
        <groupId>org.apache.maven.plugins</groupId>
        <artifactId>maven-compiler-plugin</artifactId>
        <version>2.5.1</version>
        <configuration>
            <source>${java-version}</source>
            <target>${java-version}</target>
            <compilerArgument>-Xlint:all</compilerArgument>
            <showWarnings>true</showWarnings>
            <showDeprecation>true</showDeprecation>
        </configuration>
    </plugin>
    <plugin>
        <groupId>org.codehaus.mojo</groupId>
        <artifactId>exec-maven-plugin</artifactId>
        <version>1.2.1</version>
        <configuration>
            <mainClass>org.test.int1.Main</mainClass>
        </configuration>
    </plugin>
</plugins>
3.2 web.xml : 스프링과 관련된 설정, xml파일의 경로 설정, dispatcher url 패턴 설정
<?xml version="1.0" encoding="UTF-8"?>
<!DOCTYPE web-app PUBLIC
        "-//Sun Microsystems, Inc.//DTD Web Application 2.3//EN"
        "http://java.sun.com/dtd/web-app_2_3.dtd" >

<web-app version="2.5" xmlns="http://java.sun.com/xml/ns/javaee"
         xmlns:xsi="http://www.w3.org/2001/XMLSchema-instance"
         xsi:schemaLocation="http://java.sun.com/xml/ns/javaee http://java.sun.com/xml/ns/javaee/web-app_2_5.xsd">

    <display-name>Archetype Created Web Application</display-name>

    <context-param>
        <param-name>contextConfigLocation</param-name>
        <param-value>/WEB-INF/spring-config/applicationContext.xml</param-value>
    </context-param>

    <listener>
        <listener-class>org.springframework.web.context.ContextLoaderListener</listener-class>
    </listener>

    <servlet>
        <servlet-name>dispatcher</servlet-name>
        <servlet-class>org.springframework.web.servlet.DispatcherServlet</servlet-class>
        <init-param>
            <param-name>contextConfigLocation</param-name>
            <param-value>/WEB-INF/spring-config/dispatcher-servlet.xml</param-value>
        </init-param>
        <load-on-startup>1</load-on-startup>
    </servlet>

    <servlet-mapping>
        <servlet-name>dispatcher</servlet-name>
        <url-pattern>/</url-pattern>
    </servlet-mapping>

</web-app>
3.3 applicationContext.xml : 수정사항 없음, 프로젝트 진행하면서 수정 및 추가 예정
3.4 dispatcher-servlet.xml : mvc관련 설정 추가
<?xml version="1.0" encoding="UTF-8"?>
<beans xmlns="http://www.springframework.org/schema/beans"
       xmlns:xsi="http://www.w3.org/2001/XMLSchema-instance" xmlns:mvc="http://www.springframework.org/schema/mvc"
       xmlns:context="http://www.springframework.org/schema/context"
       xsi:schemaLocation="http://www.springframework.org/schema/beans http://www.springframework.org/schema/beans/spring-beans.xsd http://www.springframework.org/schema/mvc http://www.springframework.org/schema/mvc/spring-mvc.xsd http://www.springframework.org/schema/context http://www.springframework.org/schema/context/spring-context.xsd">

    <!--애너테이션 인식-->
    <mvc:annotation-driven/>

    <!--정적자원 매핑-->
    <mvc:resources mapping="/resources/**" location="/resources/"/>

    <!--viewResolver 설정-->
    <bean class="org.springframework.web.servlet.view.InternalResourceViewResolver">
        <property name="prefix" value="/WEB-INF/views/"/>
        <property name="suffix" value=".jsp"/>
    </bean>

    <!--기본패키지 설정-->
    <context:component-scan base-package="com.doubles.mvcboard"/>

</beans>
3.5 log4j.xml : 로그 관련 설정
<?xml version="1.0" encoding="UTF-8"?>
<!DOCTYPE log4j:configuration PUBLIC "-//APACHE//DTD LOG4J 1.2//EN" "log4j.dtd">
<log4j:configuration xmlns:log4j="http://jakarta.apache.org/log4j/">

    <!-- Appenders -->
    <appender name="console" class="org.apache.log4j.ConsoleAppender">
        <param name="Target" value="System.out" />
        <layout class="org.apache.log4j.PatternLayout">
            <param name="ConversionPattern" value="%-5p: %c - %m%n" />
        </layout>
    </appender>

    <!-- Application Loggers -->
    <logger name="com.doubles.mvcboard">
        <level value="info" />
    </logger>

    <!-- 3rdparty Loggers -->
    <logger name="org.springframework.core">
        <level value="info" />
    </logger>

    <logger name="org.springframework.beans">
        <level value="info" />
    </logger>

    <logger name="org.springframework.context">
        <level value="info" />
    </logger>

    <logger name="org.springframework.web">
        <level value="info" />
    </logger>

    <!-- Root Logger -->
    <root>
        <priority value="warn" />
        <appender-ref ref="console" />
    </root>

</log4j:configuration>
3.6 디렉토리설정 : 자바 코드, 설정파일, 테스트 코드 등이 위치할 디렉토리를 생성하고 각각의 role을 정의
해당 디렉토리를 생성하고, 우클릭한 뒤 Mark Directory as에서 각각에 해당하는 role을 선택한다.
src/main/java:sources Rootsrc/main/resourecs:resources Rootsrc/test/java:test sources Rootsrc/test/resourecs:test resources Root
4. Tomcat Server 설정
Run>edit configurations>tomcat server>local선택Name: 사용자가 정의한 tomcat server 이름을 지정해준다.Server탭에서 설정해야 할 것configure...: tomcat 디렉토리 설정port: 포트 설정, 기본설정은 8080이지만, 80으로 변경
Deployment탭에서 설정해야 할 것artifact:war exploded선택
5. 그외의 설정 : web과 관련된 디렉토리 생성
WEB-INF/views: jsp 페이지가 위치할 디렉토리 생성한다.webapp/resources: 정적자원(js, css, 이미지파일 등)이 위치할 디렉토리 생성한다.
6. HomeController, home.jsp 작성
6.1 HomeController
@Controller
public class HomeController {

    @RequestMapping("/")
    public String home(Model model) {

        model.addAttribute("greeting", "hello world");

        return "home";
    }

}
6.2 home.jsp
<%@ page contentType="text/html;charset=UTF-8" language="java" %>
<html>
<head>
    <title>Home</title>
</head>
<body>

    <h2>This is welcome page....</h2>

    <p>${greeting}</p>

</body>
</html>
7. 서버 구동후 확인
위와 같이 모든설정을 마무리하고 톰캣서버를 구동하면 브라우저에 화면에 아래와 같이 hello world가 출력되면 성공적으로 프로젝트가 생성된 것이다.

참고 출처
- http://javaengine.tistory.com/313
- http://multifrontgarden.tistory.com/108
- https://nesoy.github.io/articles/2017-02/SpringMVC
- http://jhleed.tistory.com/75